Before starting with deploying Virtual Network in Azure, Lets understand what Azure Virtual Network is and why do we need in Azure.
Azure Virtual Network is a network infrastructure which is used to provide connectivity between VM’s and Services residing in same Virtual Network.
In networking term it can be considered as one isolated network imagine like a VLAN but it is more than that.
We implement Virtual Network in Azure to provide:
1. Cross-Premises connectivity/Hybrid solution using Point-to-Site/Site-to-Site connection.
2. Communication between VM’s and Services.
3. Bring your own ip address.
Else, we don’t need Virtual Network to be implemented in Azure.
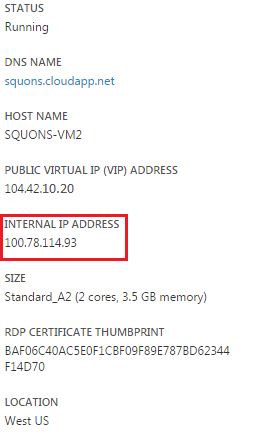
Consider two VM’s named “SQUONS-VM” and “SQUONS-VM2” deployed in Azure without using Virtual network.

Here, both VM can ping each other as they reside in same Cloud Service. But the ip assigned to the VM is through Azure internal DHCP sever randomly and ip changes after every reboot.
So to deploy VM’s on the network, where user defines its own block of addresses to be used by the VM’s such a logical network in Azure is known as Virtual Network.
Virtual Network also allows us to use private address within our internal network defined in RFC 1918.
1. 10.0.0.0 – 10.255.255.255 (10.0.0.0/8)
2. 172.16.0.0 – 172.31.255.255 (172.16.0.0/12)
3. 192.168.0.0 – 192.168.255.255 (192.168.0.0/16)
Recently, Azure also leverages to use any ip address internally apart from the one which is defined in RFC 1918.
Let’s begin with creating Virtual Network in Azure.
Following are the steps to create Virtual Network in Azure from Azure management console:
1. Go to Network section, by scrolling down the components present on left hand in management portal.
Click on “Create a Virtual Network”.
2. Provide a Name to your Virtual Network and select the Location where you want to deploy Virtual Network.
3. Now under DNS Servers and VPN Connectivity, you can provide default DNS server ip address which VM is going to take after getting deployed in SQUONS-NETWORK and you can also use VPN connectivity such as Point-To-Site, Site-To-Site and ExpressRoute to connect between On-premise and Azure.
ExpressRoute option is available within the Site-To-Site Connectivity option.
I will be making separate article for Point-To-Site, Site-To-Site and ExpressRoute, so keep posted here.
Meanwhile,
Point-To-Site Connectivity:
It is used to connect individual computer with the Azure Virtual network through VPN Client over SSTP (Secure Socket Tunneling Protocol). It supports up to 128 clients per Azure Virtual Network. It doesn’t need any separate IPSEC VPN device to connect because user is connecting from VPN Client installed on their computer.
Here user needs to login manually whenever he/she needs to perform any kind of administration, testing, development etc.
Site-To-Site Connectivity:
It is used to connect single or multiple site on-premise networks with Azure Virtual through IPSEC VPN device or you can also use software solution such as Microsoft Routing and Remote Access Service.
ExpressRoute:
It is used to provide dedicate/private connectivity between on-premise datacenter or co-located in other datacenter and Microsoft Azure, It’s like extending your infrastructure to Azure. This is achieved with the help of third-party provider such as an Internet Exchange Provider (IXP) or a Network Service Provider (NSP).
It comes in two models:
a. Exchange Provider Model
Here, the connection is established over BGP (Border Gateway Protocol).
b. Network Service Provider Model
Here, the connection is established over MPLS (Multi Protocol Label Switching).
4. Next, you need to define Virtual Network Address Space by creating the network subnets. Network subnet is the block which holds range of ip addresses and is obtained by dividing a huge network into chunks of subnets and every single subnet holds some ip addresses.
VM deployed within created subnet will get the ip address from specified range of address in sequential order.
Here, I have created “SQUONS-SUBNET”
5. You can see progress of Virtual Network in Command Bar.
Note: You cannot move existing VM into Virtual Network nor you can move VM from one Virtual Network to another Virtual Network. Under one Virtual Network, we can create multiple Virtual Subnets.
For demonstration, I have created two VM’s named “SQUONS-VM” and “SQUONS-VM2” in Azure Virtual Network “SQUONS-NETWORK” under Virtual Subnet “SQUONS-SUBNET”.
Note: Microsoft Azure reserves 3 ip address excluding subnet id and subnet broadcast address.
For example: In our scenario, I have used Subnet of 192.168.10.0/24 so here 192.168.10.0 (subnet id), 192.168.10.1, 192.168.10.2, 192.168.10.3 and 192.168.10.255(subnet broadcast address) is reserved and cannot be used. Whereas, addresses between 192.168.10.4 – 192.168.10.254 in subnet 192.168.10.0/24 is assigned to the VM sequentially by Azure dynamically.
Hence it is visible above that my 1st VM “SQUONS-VM” is assigned ip address as 192.168.10.4, 2nd VM “SQUONS-VM2” as 192.168.10.5 and it will continue so on.
Here, VM assigned within the subnet can communicate with each other as depicted below:
Note: Disable firewall setting to achieve PING success, as ICMP is blocked by default.


Thanks for providing your information for more updates on Azure Azure Online Course Get touch with us
ReplyDelete