This is continuation of my previous article “Creating VM through PowerShell Part I (Quick Create).
In this article, we will see how to create Virtual Machine through Azure PowerShell.
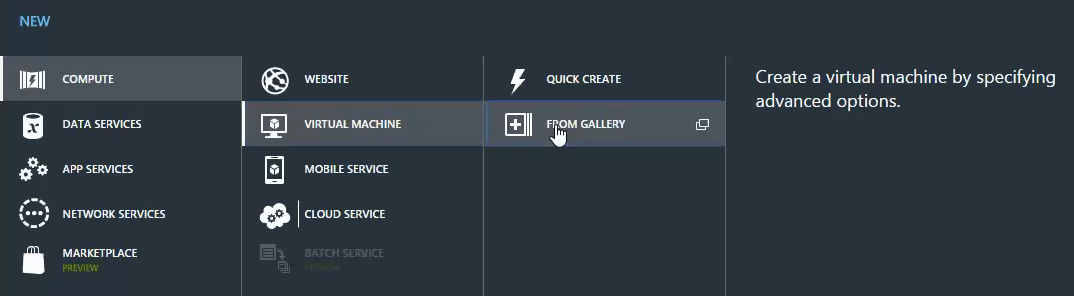
Following are the syntax to be used to deploy “Custom Create” VM in Microsoft Azure through Azure PowerShell:
$adminUser = "Username"
$password = "Password"
$serviceName = "Service_Name" # ServiceName means CloudService name e.g. “squons”
$location = "Location_Name" # In which location you want to deploy your VM e.g. "West US"
$size = "Size_Name" # Size/Tier name e.g. “Small/Medium/Large” etc
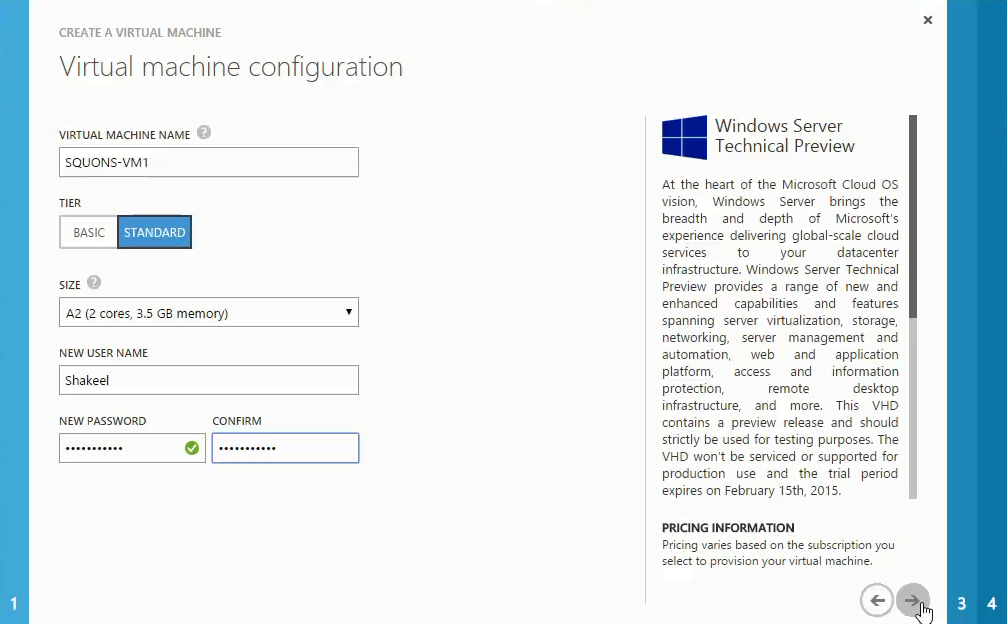
$vmName = "VM_Name" # Name or Virtual Machine e.g. “SQUONS-VM1”
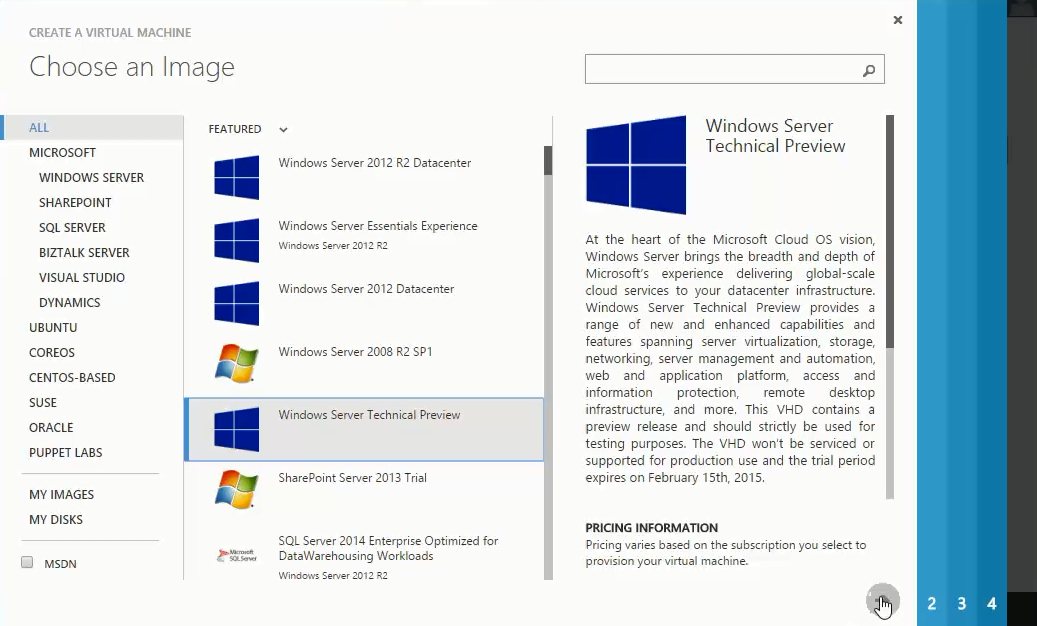
$imageFamily = "Windows Server 2012 R2 Datacenter"
$imageName = Get-AzureVMImage |
where { $_.ImageFamily -eq $imageFamily } |
sort PublishedDate -Descending |
select -ExpandProperty ImageName -First 1
New-AzureVMConfig -Name $vmName `
-InstanceSize $size `
-ImageName $imageName |
Add-AzureProvisioningConfig -Windows `
-AdminUsername $adminUser `
-Password $password |
Add-AzureDataDisk -CreateNew `
-DiskSizeInGB 10 `
-LUN 0 `
-DiskLabel "data" |
Add-AzureEndpoint -Name "RDP" `
-Protocol tcp `
-LocalPort 3389 `
-PublicPort 49913 |
New-AzureVM -ServiceName $serviceName `
-Location $location
Following figure depicts the PowerShell command used to deploy VM in Microsoft Azure:

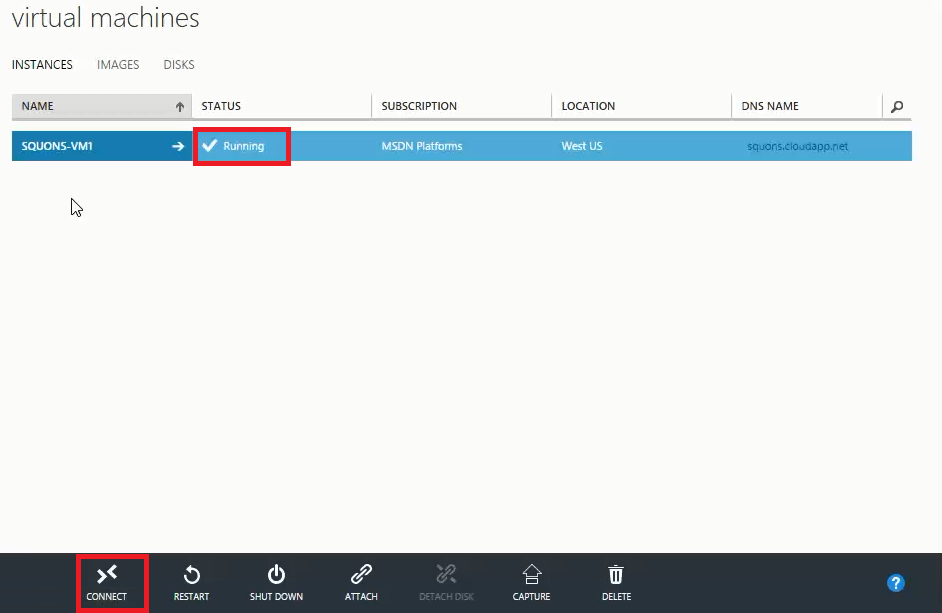
To check the VM status through Azure PowerShell, use the below command:
PS C:\> Get-AzureVM

To know more about step by step of each and every component used while deploying VM, you can refer to http://squons.blogspot.in/2015/03/creating-virtual-machine-in-microsoft.html.
To see how to "Quick Create" VM through Azure PowerShell, goto http://squons.blogspot.in/2015/03/creating-vm-through-powershell-part-i.html.
In this article, we will see how to create Virtual Machine through Azure PowerShell.
Following are the syntax to be used to deploy “Custom Create” VM in Microsoft Azure through Azure PowerShell:
$adminUser = "Username"
$password = "Password"
$serviceName = "Service_Name" # ServiceName means CloudService name e.g. “squons”
$location = "Location_Name" # In which location you want to deploy your VM e.g. "West US"
$size = "Size_Name" # Size/Tier name e.g. “Small/Medium/Large” etc
$vmName = "VM_Name" # Name or Virtual Machine e.g. “SQUONS-VM1”
$imageFamily = "Windows Server 2012 R2 Datacenter"
$imageName = Get-AzureVMImage |
where { $_.ImageFamily -eq $imageFamily } |
sort PublishedDate -Descending |
select -ExpandProperty ImageName -First 1
New-AzureVMConfig -Name $vmName `
-InstanceSize $size `
-ImageName $imageName |
Add-AzureProvisioningConfig -Windows `
-AdminUsername $adminUser `
-Password $password |
Add-AzureDataDisk -CreateNew `
-DiskSizeInGB 10 `
-LUN 0 `
-DiskLabel "data" |
Add-AzureEndpoint -Name "RDP" `
-Protocol tcp `
-LocalPort 3389 `
-PublicPort 49913 |
New-AzureVM -ServiceName $serviceName `
-Location $location
Following figure depicts the PowerShell command used to deploy VM in Microsoft Azure:
To check the VM status through Azure PowerShell, use the below command:
PS C:\> Get-AzureVM
To know more about step by step of each and every component used while deploying VM, you can refer to http://squons.blogspot.in/2015/03/creating-virtual-machine-in-microsoft.html.
To see how to "Quick Create" VM through Azure PowerShell, goto http://squons.blogspot.in/2015/03/creating-vm-through-powershell-part-i.html.